Friday, May 30, 2014

The Weeds! I Need More Straw! 5-30-2014


Here are my sugar snap peas:
The left is Sugar Daddy Sweet Pea, they are shorter, they produce a lot of flat pods, and more grew from what I planted,
the right is Super Sweet Sugar Snap, there are about 1/2 as less plants from the same amount planted, they are taller and have thicker stalks, they produce a nice thick juicy pod
 
Look at how thick the Super Sweet is
 
 
Can you see how dense the Sugar Daddy grows?
 
 
Ready to pick!
 
 
Once he figured out not to pick the leaves, he did pretty good at making them disappear

 
He is so excited that he can eat something...he loves food
 
 
My first harvest of the year! 


Onions, Cukes, Carrots, Jalepeno, Rosemary, Cauliflower, Pumpkin, Sugar Snap Peas, Green Beans
 
Pumpkin
 
 
Cauliflower


 Carrot

Red Onion

 
Green Beans - Kentucky Wonder
 
 
Close up of Kentucky Wonder

 
Tomatoes:  I had a lot of thistle to pick and I didn't bring my raw hide gloves, just regular garden gloves


 Can you see the little tomato!?!

 
Look at that!
 
 
Zucchini:


My popsicle sticks that the kids love to play with and work great to label plants, they kind of blend in and are hard to see unless you are looking for them. I bought a big box here. The kids love them and they are super cheap.  1000 for $8 and free shipping! 


My watermelon is actually growing


My Father-in-law's lettuce....isn't it just beautiful, I want to plant some in my flower garden


Saturday, May 24, 2014

Quick and Easy Weekend Brunch, Sausage and Cheese Balls


We had a baseball game from 10:30-12:30 today.  We needed something quick and filling to last us till we could get a late lunch.  I pulled out some breakfast sausage from the freezer a couple days earlier so I could make sausage balls.  The prep on this is pretty quick and can even be done the night before.  I like to mix this in the stand mixer so I don't get my hands too dirty.  I shape the balls with one hand and a spoon.

These are also great appetizers or finger foods for a party!

To avoid sticking, you should cook these on parchment paper.  It sticks to greased aluminum foil.

Once cooked, I put the balls in a kitchen towel lined bowl to soak up any excess grease and to hold in the heat while we eat.  That way when we go back for seconds they are still warm.


The kids love that these are in the shape of balls and eat them right up.  
 

 I served it with fruit salad. The sweetness of the fruit complemented the saltiness of the sausage balls


Sausage and Cheese Balls

 
Ingredients:
  • 1 1/2 cups all-purpose flour      
  • 1/2 teaspoon coarse salt
  • 1/4 teaspoon ground black pepper
  • 1/2 teaspoon paprika
  • 1 1/2 teaspoons baking powder
  • 2 cups grated cheddar or Colby jack cheese 
  • 1 pound breakfast sausage
  • 3 tablespoons melted butter
Preheat oven to 400 degrees.
 
In mixing bowl, mix together flour, salt, pepper, paprika, baking powder, and cheese.  Add sausage and butter.  Mix until well combined.  Roll mixture into 1-inch balls. Place balls about 1/2 inch apart, on a parchment-lined baking sheet. Bake 20-25 minutes or until balls are golden and cooked through. 
 
Serve warm.


Friday, May 16, 2014

The Best Pizza Crust Recipe Ever!


I must share a recipe with you.  I only recently began using it for pizza.  I adapted it from a focaccia bread recipe.  I had been constantly changing the dough I use for pizza because there was always something I didn't like about it, but we have been using this one to make our weekly pizza for several months now.  I love that you can tell it has olive oil in it.   It also has the perfect pizza crust texture.  It is slightly chewy and not too doughy.  It tastes so good that we don't have leftovers when I make pizza any more.  I use to work at a well known pizza chain, so I know my pizza!

If only one pizza crust is required, either halve the recipe or freeze half.

To prevent big bubbles from forming in the middle of your pizza, poke it all over with a fork.

I use Hunts pasta sauce (garlic and herb variety).  That gives me enough to make 3 pizzas.  I usually only make one pizza at a time so I put the extra sauce into two Rubbermaid takealongs 1 cup containers for liquids.  You can find them here.  You want to leave about 1/2" room at the top.

Here it is ready to go in the oven.


Warm and cheesy, and making my kids beg to not wait for it to cool down

Pizza Crust

by: asimplehousewifesblog.blogspot.com
makes 2 pizza crust

5 1/2 cups bread flour (all-purpose can be used as a substitute)
1 package or 2 1/4 teaspoons fast rising yeast
1 Tablespoon Italian seasoning
1 teaspoon salt
2 cups warm water (120F)
4 Tablespoons olive oil, divided
1-2 teaspoons garlic salt
Grated parmesan cheese (parmesan and Romano cheese can be used as a substitute)
Desired pizza sauce, toppings, cheese

In mixer bowl, combine flour, yeast, Italian seasoning, and 1 teaspoon salt.
With dough hook, stir in water and 3 Tablespoons olive oil for 5 minutes or until well mixed and dough is slightly sticky to touch.  If it is too moist, add flour a tablespoon at a time until it is the right consistency for bread.  If it is too crumbly and dry, add water a teaspoon at a time until it is the right consistency.
Cover bowl and let dough rise in a warm place until doubled in size (30-60 minutes)
Turn dough onto floured surface and gently knead for one minute to release air pockets.
Lightly oil two baking sheets or pizza pans.
Divide the dough in half and place each half on a baking sheet or pizza pan.
Press or roll into 12-14 inch rounds or into desired pizza shape.
Cover rounds with clean towels and let rise for approximately 30 minutes.
Preheat oven to 400F.
Brush the crust of each round with 1/2 Tablespoon olive oil.  Sprinkle crust with 1/2 to 1 teaspoon garlic salt and grated parmesan cheese.
Put any kind of sauce, toppings, or cheese you like.
Bake for 15 mins or until crust is golden


Thursday, May 15, 2014

I actually planted annuals!


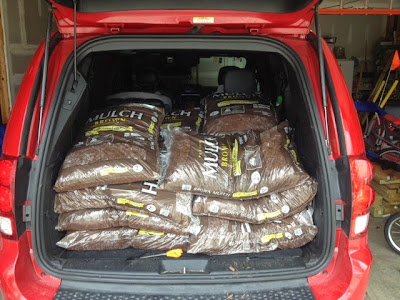
There was a sale on the mulch I use and I missed it.  I kept meaning to go out and pick some up, but I had the flu during the sale and then I was just busy trying to get my house back in order.  You know, life.  I ended up ordering it online an hour after the store closed on the day the sale ended.  I wasn't sure if I would still get the sale price, but it worked!  I then had four days to pick it up.  I decided to actually go the next day and just get it over with.  While I was there, I saw flowers and I just love flowers.  They cheer me up.  I decided I would go get some for my window boxes.  They didn't have much to choose from, but I still managed to get too many.  Look at all the pretty flowers sitting in my passenger seat.


I planted annual dianthus and sweet potato vine in baskets under my kitchen window.  They only had two vines to chose from.  Sidekick sweet potato vine and a shade vine.  I found out the last year I had used the shade vine.  I bought a pack of full sun flowers on clearance sale in June for container planting and it was petunias and geraniums and this shade vine.  The vine shriveled up and died pretty quickly, but the rest of it did fine.  Now I know I didn't do anything to the vine, it was just not meant for full sun.

Facing west:


Facing South


Aren't they pretty?  Is one vine enough?  I'm not sure how these will grow.


I can't wait for these to fill out the basket.


You may have noticed that I had more flowers in my van than I put in the boxes.  The front of my house doesn't have much color.  I have already planted pink phlox under my mailbox by the road to replace the pink perennial dianthus that did not survive our brutally cold winter.  They are hardy to -10/-20F and we got down to around -15/-20F.  I wanted to plant something near the front door though.  My house faces north so the front is a little shaded.  I planted impatients last year and they didn't flourish.  They stayed about the same size and looked dried out a lot.  My front walk gets at least 6-8 hours of sun in the morning, so there wasn't as much shade as I though there would be.  This year I decided to try petunias.  They are really pretty and I love the big flowers so hopefully they fill in nicely. 
I also needed to prune back some shrubs.  Since it was a new build 10 years ago, fast growing shrubs got planted and they are still around.  I'm hoping to take out the Burning Bushes in the front.  I have 2 windows to the left of my porch that are only 3 feet off the ground.  Burning bushes quickly grow to be 10 feet tall and 15 feet wide.  Are you seeing a problem yet?  I have 3 planted in a spot only 15 feet wide.  The amount of cutting I have to do to keep it from blocking my window and not chocking out my front porch is ridiculous.  I have 2 other Burning Bushes in little 2'-3' areas to each side of my driveway.  The only one that really bothers me is the one next to my front walk way because 2-3 feet is not enough space for a Burning Bush.  I also have what I think is a type of Juniper.  It also grows too fast and I have 5 in a 15 foot row in front of the Burning Bushes.
 
This is a before/during picture, I already planted a begonia before I thought to take a picture. 


Here is what greats you when you come to my house now.  Much more inviting.  Can you see the Evergreen shrub is only planted a foot from the walk?


I also have a fushia hanging basket.  It is so bright and has lots of flowers.

 
This is what it looks like from below


The smell of mulch fills my van

Wednesday, May 14, 2014

Two Pot Chicken Pesto Pasta with Broccoli

We are just starting to potty train 2 year old M and so we have been going to the bathroom every 30 minutes.  The first day we just had leftovers, but we couldn't do leftovers two days in a row.  I had to come up with a quick and easy meal.

This meal is one I can make in 30 minutes.  I get out all the ingredients (not pictured is milk and parmesan cheese since I need that later). 

I freeze my own spinach.  Sometimes we can't finish that big bag of spinach that I buy so before it goes bad, I bag about 2 cups and freeze it so I can add it to soups or smoothies later. 

I buy my chicken in bulk then slice and place 2 pounds in a freezer ziplock quart size bag.  They are then already sliced for meals and thaw quicker then whole chicken breasts.


I boil the spaghetti in a pot while I cook the chicken. 


Then when the chicken is done and the pasta is almost done, I throw the broccoli on top of the chicken to steam while I drain the pasta. 


I had a lot of liquid so I drained most of it.


Then, I throw the pasta, pesto, and a couple handfuls of spinach in and stir it all together. 


Then I mix in a little milk and parmesan cheese.


Then it's ready to serve.  Perfect for busy days.


Chicken Pesto Pasta with Broccoli

8 oz elbow pasta
1-2 pounds sliced chicken breast
16 oz frozen broccoli florets
2 cups spinach, frozen or fresh, coarsely chopped
1 container Classico Pesto
1/2 cup milk
1/4 parmesan cheese

  1. Bring a large pot of water to boil for the pasta. Once it reaches a full boil, add the pasta and continue to boil until the pasta is tender (7-10 minutes). Once the pasta is tender, drain the pasta in a colander.
  2. While the pasta is cooking, thinly slice the chicken breast. Over medium heat, add about 1/4 to 1/2 cup of water and the sliced chicken.  Sauté until it is no longer pink (about 5-10 minutes).  Add broccoli to top of chicken and cover pot to allow broccoli to steam for approximately 3 minutes or until done.  If desired, you can then drain excess liquid.
  3. Add the pesto, pasta, and spinach to the skillet. Stir to combine and remain on heat for 5 minutes to warm back up.  Turn heat off.
  4. Add the milk and parmesan cheese.  Stir to combine.